


🏄 Surfing & Wind Sports
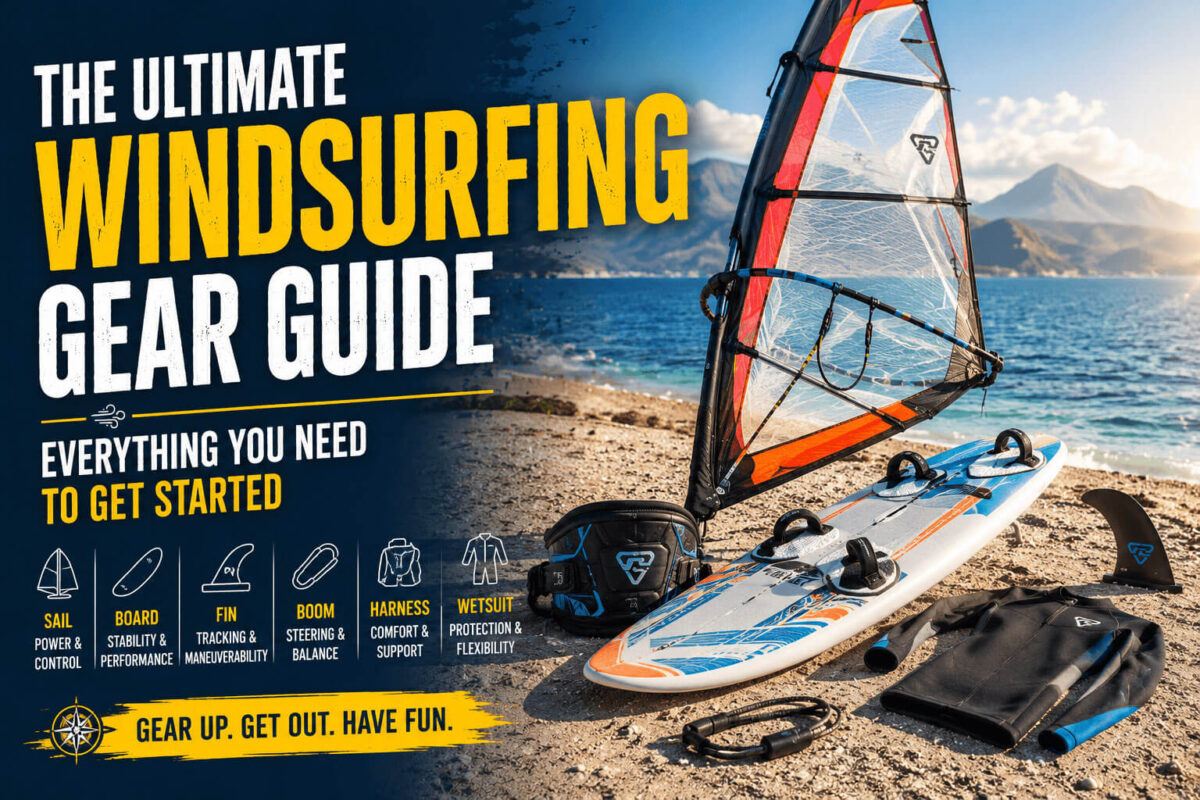
The Ultimate Windsurfing Gear Guide: Everything You Need to Get Started
Jul
The Ultimate Windsurfing Gear Guide: Everything You Need to Get Started
This windsurfing gear guide covers every piece of kit you need — boards, sails, masts, booms, harnesses, and wetsuits — with honest guidance on what to buy first, what to skip, and how to avoid the expensive mistakes every beginner makes.
- Why Gear Choice Matters More Than You Think
- Boards: Volume, Shape, and What to Buy First
- Sail Types Compared by Rider Level
- Safety Gear and Non-Negotiable Kit
- Setting Up Your Rig Step by Step
- Essential Accessories for Every Session
- Where to Buy Windsurfing Gear
- New vs. Used Gear: A Honest Comparison
- Gear Care, Storage, and Longevity
- Frequently Asked Questions
Why Your Windsurfing Gear Guide Starts With Honesty, Not a Shopping List
Most gear guides start with a list and a price. This one starts with a principle: the wrong equipment doesn’t just slow your progress — it can make the sport feel physically impossible and kill motivation before you’ve had a fair shot at it. The windsurfing gear guide landscape is full of advice written to sell products rather than serve beginners. Understanding what you actually need, versus what shops would prefer you to buy, is the first real skill this sport demands of you.
Windsurfing is a two-part system: a board that floats you and provides a platform, and a rig — mast, boom, sail, and associated hardware — that captures wind and moves you. Those two components interact constantly, and a mismatch between them (an under-volumed board with an over-sized sail, for instance) creates a session that is exhausting, demoralising, and technically counterproductive. Getting this fit right from the beginning is worth more than any single piece of premium kit.
The sport has also changed significantly in the past decade. Modern construction techniques mean that used gear from five or six years ago is often still structurally sound and pedagogically appropriate for new riders — and available at a fraction of the new-gear price. The assumption that you must buy new to learn correctly is a commercial claim, not a technical one. This windsurfing gear guide is built to help you make decisions that serve your riding, your budget, and your long-term enjoyment of a sport that, once it gets hold of you, tends to become a fairly serious commitment.
Before you buy anything, know your weight, your likely wind conditions (average wind speed and consistency at your home spot), and whether you have storage and transport for larger equipment. Boards up to 260 litres are common in beginner kits — that’s a significant physical object to move. These practical factors shape your gear decisions as much as budget does, and a good windsurfing gear guide must account for all of them.
“The best windsurfing gear is not the most expensive gear — it’s the gear that matches where you actually are in your development, not where you hope to be in six months.”
Windsurfing Boards: Volume, Shape, and Getting the First One Right
Understanding Volume and Why It Changes Everything
Volume — measured in litres — determines how much a board floats you, and that flotation determines how much time you spend sailing versus how much time you spend climbing back on after falls. For beginners, more volume is almost always better. A board with 180–260 litres gives you a stable platform that allows you to focus cognitive resources on the sail and the wind rather than on not falling off. The trade-off is that high-volume boards are slower to respond and less manoeuvrable — which is entirely fine at the learning stage, and becomes increasingly irrelevant as you move into an intermediate kit.
A useful rule of thumb from most windsurfing instructors: your first board should have volume equal to at least twice your body weight in kilograms. At 80kg, that points you toward a board of 160 litres as a functional minimum, with 200+ litres being genuinely more comfortable. Brands like Fanatic, JP Australia, and Starboard all make reliable beginner boards in this range, and their secondhand equivalents from three to seven years ago hold up well structurally.
Board Shape: Wide vs. Narrow, Short vs. Long
Width matters as much as volume. A wide board (85cm or more) is dramatically more stable than a narrow one of the same volume — the extra width resists tipping and gives you a larger platform to work with when uphauling or foot-steering in light wind. For beginners, width is the primary shape priority, ahead of length, rocker profile, or tail shape. As you progress into planing conditions and footstraps, narrower, shorter boards become relevant — but that’s a later-phase decision, not a first-kit one.
Board length affects early glide and ease of uphauling. Longer boards (around 270–290cm) track better in light winds and are easier to uphaul because the nose sits higher and the board doesn’t pivot underfoot as aggressively. Shorter boards are more agile and easier to transport but demand a higher baseline of balance. Most beginner boards hit 250–280cm in length — a range that balances glide, stability, and practical manageability.
Construction Materials and What They Mean for Durability
Entry-level boards are typically constructed from polyethylene (PE), which is impact-resistant, relatively inexpensive, and significantly heavier than composite alternatives. PE boards are genuinely robust for beach launching and the regular crashes of the learning phase — a quality that matters a great deal when you’re tumbling off in rocky shallows. Intermediate and advanced boards shift to epoxy sandwich construction, which is lighter, stiffer, and faster, but more fragile on impact and more expensive to repair when damaged.
For a beginner, PE or ASA plastic construction is often the pragmatic choice — not the glamorous one, but the one that survives a learning season without a repair bill. If budget allows, an epoxy beginner board in good used condition is a reasonable step up in feel and weight, but should be inspected carefully for delamination, pressure dents, and fin-box cracks before purchase. A windsurfing gear guide that doesn’t account for real-world durability on a real-world budget is missing the most important variable in first-kit decisions.
Windsurfing Sail Types Compared: Choosing the Right Sail for Your Level
| Sail Type | Size Range | Best Wind Range | Ideal For | Rider Level |
|---|---|---|---|---|
| Beginner / School Sail (monofilm, few battens) | 3.5–5.5m² | 8–16 knots | Uphauling, balance drills, slow-speed maneuvering | Beginner |
| Freeride Sail (full-batten, rotational) | 5.0–8.5m² | 10–25 knots | Planing, harness use, gybing, broad wind-range riding | Beginner–Intermediate |
| Freestyle Sail (stiff, low-twist, compact) | 4.0–5.5m² | 15–28 knots | Tricks, powered moves, flat-water freestyle sessions | Intermediate–Advanced |
| Wave Sail (short luff, high draft-forward) | 3.3–5.3m² | 18–35+ knots | Wave riding, jumping, surf launches, high-wind control | Advanced |
| Race / Slalom Sail (large, high-aspect, stiff) | 7.0–11.0m² | 10–22 knots | Speed, upwind efficiency, competition, course racing | Advanced–Expert |
For most beginners, a freeride sail in the 5.0–6.5m² range represents the most versatile single-sail investment. It handles a broad range of conditions, works well with beginner boards and standard RDM masts, and remains usable for years into your riding progression. Avoid the temptation to buy a wave sail early — the low-end power delivery and short luff length make them significantly harder to use in the light winds where most learning happens.
Mast compatibility is critical and often overlooked in windsurfing gear guides. Each sail specifies an IMCS (Index of Mast Check System) rating and a luff length. Pairing a sail with the wrong mast — either too stiff or too flexible — produces incorrect sail shape that underperforms regardless of riding skill. Always match mast IMCS and length to the sail manufacturer’s specification, and strongly prefer the recommended mast over a generic alternative when budget allows.
Safety Gear: The Non-Negotiable Part of Any Windsurfing Gear Guide
Personal Flotation and Impact Protection
A buoyancy aid is not optional for beginners — it is foundational. The distinction between a buoyancy aid and a life jacket matters: a buoyancy aid provides additional flotation and is designed for conscious, active water users; a life jacket is designed to turn an unconscious casualty face-up in the water. For windsurfing, a 50N or 100N buoyancy aid with good arm mobility is standard. Fit it so you can raise your arms fully without the garment riding up over your shoulders — a poor fit reduces both safety and comfort to the point where riders stop wearing it, which defeats the purpose entirely.
Impact vests — neoprene or foam-padded garments worn over or under a wetsuit — are increasingly popular in wave sailing and high-wind riding, where falls happen at speed and the water surface is less forgiving. They don’t replace a buoyancy aid but add a useful layer of rib and spine protection in conditions where impact risk is elevated. For flatwater beginner sailing, they’re optional. For anything involving chop, swell, or gusty conditions, they’re a sensible addition to the kit list.
Helmets, Footwear, and Sun Protection
Helmets are not universal in windsurfing the way they are in kiteboarding, but they’re strongly recommended for wave sailing, learning water-starts where the boom is swinging overhead, and any session in congested or rocky water. A lightweight wake or watersports helmet adds minimal bulk and eliminates a meaningful category of head-impact risk. Many intermediate riders who skipped helmets for years adopt them after one boom-to-head contact in a powered gybe.
Wetsuit boots protect against rocky launch sites, sea urchins, and the cold — and they improve grip on the board’s EVA deck in wet conditions. In warm-water destinations, board shorts and a rash guard may suffice thermally, but footwear still provides meaningful protection at the launch. Long-sleeve rash guards and UV-rated neckwarmers address the significant sun exposure of multi-hour sessions on reflective water — an underestimated safety variable in beginner windsurfing gear guides.
Leashes, Harnesses, and Mast Base Safety Lines
A mast base safety line — a short cord connecting the mast base to the board — prevents the rig from drifting away from the board if you become separated after a fall. In light winds, losing the rig and being unable to retrieve it leaves you without propulsion and potentially in difficulty. This is a low-cost piece of kit that belongs on every beginner’s board from the first session.
- Buoyancy aid (50N minimum): Wear it every session until your swimming and self-rescue skills are thoroughly tested in open water — not just in a pool.
- Mast base safety line: Essential for beginners on any tidal water or anywhere with current — rigs drift fast in moving water.
- Wetsuit appropriate to water temperature: Cold-water incapacitation is fast — a 3/2mm wetsuit is the minimum for UK and Northern European waters in summer.
- Helmet for high-wind or wave sessions: The boom travels at speed during uncontrolled gybes — head contact without a helmet is serious.
- Whistle and mirror on buoyancy aid: Compact signalling devices that take seconds to attach and can be critical in an emergency.
- Adequate UV protection: SPF 50+ water-resistant sunscreen, reapplied every 90 minutes — reflected water UV is substantially more intense than direct sunlight at the same hour.
How to Set Up a Windsurfing Rig: Step-by-Step for Beginners
Assemble the Mast and Check the Joint
Most modern masts are two-piece, joining at a ferrule joint mid-length. Slide the top section into the base section and rotate until fully seated — a poorly connected joint flexes unevenly under load and can fail during a powered gust. Check that the joint is flush, with no gap visible, before proceeding. Carbon and carbon-blend masts are lighter and more responsive but require careful handling at the joint to avoid cracking from overtightening or lateral force.
Feed the Mast Through the Sail Luff Sleeve
Lay the sail flat on the ground and feed the assembled mast through the luff tube from the tack end upward, working progressively and avoiding forced pushing that can damage the monofilm panels near the batten pockets. Once the mast is fully seated, the top should be snug against the mast tip in the sail head — any gap indicates the mast is too short for the sail and will produce a distorted, underperforming sail shape.
Attach the Mast Base and Tension the Downhaul
Connect the mast base (universal joint or plug system) to the mast foot, then run the downhaul line through the tack pulley system and tension it to the sail manufacturer’s specification — typically indicated by wrinkles running diagonally from the tack, which disappear as correct downhaul is applied. Over-downhauling flattens the sail and reduces power; under-downhauling leaves the leech too tight and makes the sail unstable in gusts. This is the single most consequential tuning variable for beginners to get right.
Attach the Boom at the Correct Height and Tension the Outhaul
Boom height should be approximately chin to shoulder height when standing on the board — higher than this makes the rig heavy and hard to control; lower creates a cramped stance that limits power transfer. Attach the boom head securely to the mast at the specified attachment point, then run the outhaul through the clew and tension until the foot of the sail shows only a small amount of positive camber. The outhaul controls sail power: more tension flattens the sail and reduces power; less tension creates depth and increases drive in light wind.
Insert Battens, Check the Rig, and Attach to the Board
Insert all battens from the leech end, tensioning each one to remove wrinkles along the batten pocket while allowing the sail to rotate cleanly around the mast when sheeted in and out. Over-tensioned battens create a rigid, slow-rotating sail; under-tensioned battens flap and lose shape under load. Once battens are set, carry the rig to the board, insert the mast base into the mast track, and connect the safety line before launching. Never launch without confirming the mast base is fully locked in the track — an unlocked joint can eject the rig from the board at speed.
Set Harness Lines and Footstrap Positions Before the First Run
Harness lines should be positioned on the boom so that the rig balances in your hands with minimal pulling toward the nose or tail when you hook in — typically 60–70cm back from the mast for most freeride sails in the 5.0–7.0m² range. Footstraps should start in their outermost, most inboard setting for beginners and move progressively outboard as speed and confidence increase. Setting them too far out before you’re ready produces an unstable, twitchy feel that is easily mistaken for an equipment problem.
Essential Windsurfing Gear: Accessories Every Rider Actually Needs
Beyond the board and rig, the supporting kit in a windsurfing gear guide covers the accessories that determine session quality, equipment longevity, and rider comfort. These are not optional extras — they’re the practical infrastructure of the sport.
Moves rig load from arms to hips and core. Seat harnesses are more stable for beginners; waist harnesses offer more freedom for intermediate riders. Correct fit prevents back strain and allows far longer sessions.
A quality 4:1 or 6:1 pulley system makes applying correct downhaul tension physically achievable without extraordinary effort. Cheap pulleys jam, wear rope, and make tuning frustrating. Worth spending on.
Fins control upwind tracking, planing threshold, and spin-out resistance. A 46–52cm fin suits beginner high-volume boards; a smaller 28–36cm fin works for intermediate freeride planing. Having two sizes dramatically expands your usable wind range.
Salt water destroys electronics and corrodes metal fittings. A 10L dry bag protects your phone, keys, and wallet. A padded boom bag prevents transport scratches to both the boom and your vehicle interior — a small investment against a common expensive mistake.
Match thickness to water temperature, not air temperature. A 3/2mm suit covers most UK summer conditions; a 4/3mm with hood handles spring and autumn. Cold water significantly impairs grip strength and decision-making — invest in the right thickness for your location.
Windy, iKitesurf, and Windguru each model conditions differently — cross-referencing two of them takes two minutes and dramatically improves session planning. Knowing whether the wind is building or dropping before you rig changes every gear decision you make.
Where to Buy Windsurfing Gear: Six Options Evaluated Honestly
Knowing what to buy is only half the challenge — knowing where to source it without overpaying or acquiring equipment that doesn’t suit your needs is equally important. This windsurfing gear guide evaluates every major purchasing channel with honest trade-offs.
- Specialist windsurfing retailers (new gear): Shops like Windsurf Warehouse, Boards and More, and Surfdock carry current-season stock with expert advice included. You pay a premium, but the ability to ask specific technical questions and return gear that doesn’t suit is worth real money at the beginner stage. Many also offer demo programmes — renting gear before buying is the most underused option in windsurfing retail.
- Brand direct (online new gear): Fanatic, JP Australia, Starboard, and North Sails all sell direct online at competitive prices. The limitation is that you can’t inspect construction quality before purchase and returns on large items are logistically difficult. Strong option for experienced buyers who know exactly what they want.
- Specialist used gear platforms (Windsurf Classifieds, Seabreeze.com.au forums): The highest-value channel in this windsurfing gear guide. Seller communities on sport-specific forums tend to be knowledgeable and honest — misrepresenting gear to other windsurfers in a small community has social consequences. Prices are fair, descriptions are typically accurate, and you can ask technical questions before committing.
- eBay and Facebook Marketplace (used): High variability in listing quality and seller knowledge. Bargains exist, but so do boards described as “good condition” with delamination visible in the background of the photos. Always inspect in person before purchasing boards or masts through these channels — neither platform offers meaningful buyer protection on specialist sports equipment.
- School and centre sales: Many windsurfing schools sell their teaching fleet every three to four years as it ages out of the beginner programme. This gear has been well-maintained (schools depend on it), is mechanically sound, and is priced to move. Contact local centres directly — this channel rarely appears in public listings.
- Club second-hand sales and notice boards: Local windsurfing clubs often have internal notice boards (physical and digital) where members sell gear to other members. Prices are reasonable, inspection is easy, and local knowledge of the seller’s history with the equipment is often available. Joining a club for the community access alone is frequently worth the annual fee before you factor in the sailing benefits.
New vs. Used Windsurfing Gear: An Honest Side-by-Side
New gear comes with manufacturer warranty, current construction technology, and the confidence of known condition. Modern boards and sails have meaningfully improved in materials and design over the past decade — lighter, stiffer, and more forgiving across the range. For sails especially, buying new ensures correct batten tension from the start, no UV degradation in the monofilm, and a luff pocket that hasn’t stretched from years of rigging. The downside is cost: a new beginner board runs £700–£1,200, a new freeride sail £400–£700, and a new mast £200–£400 — a complete new beginner kit easily exceeds £1,800 before accessories. Depreciation is also steep; a new board loses 30–40% of its value in the first two years regardless of care.
A well-chosen used kit from a reputable seller, inspected in person, can be structurally sound and pedagogically appropriate for years of learning — at 30–50% of new cost. For beginners especially, the lower financial risk of used gear removes a layer of anxiety about damage during the fall-heavy early phase of the sport. Used boards from major brands (Fanatic Viper, JP Funster, Starboard Start) hold up well structurally and perform appropriately for the learning stage. The risks are real but manageable: hidden structural damage (addressed by the inspection protocol in Section 02), missing or incompatible components, and sails with degraded monofilm that won’t be apparent until sunlit on the water. Mitigating these requires in-person inspection and ideally a short test session before purchase — reasonable requests that any legitimate private seller should accommodate.
The verdict for most beginners: buy a used board and either a new or nearly-new sail. The board is the component most likely to get damaged during learning and least affected by age-related material degradation. The sail is the component where condition most directly affects your technique development — a sail with poor shape teaches you to compensate rather than to sail correctly. This split approach typically brings a functional beginner kit within the £700–£1,000 budget range while protecting the piece of equipment that matters most for skill development. For more on how equipment choice connects to progression, see our companion piece on the windsurfing mindset and how gear decisions affect mental confidence on the water.
Gear Care, Storage, and Making Your Windsurfing Kit Last
Post-Session Rinse and Dry: The Routine That Doubles Equipment Lifespan
Salt is the primary enemy of windsurfing equipment. Salt crystals left in fin boxes, mast tracks, boom clamp mechanisms, and mast base joints expand as they dry and cause internal corrosion that seizes components, fractures plastic, and degrades rubber seals. A fresh-water rinse of every metal and plastic fitting after every salt-water session takes under three minutes and is the single highest-return maintenance habit in this entire windsurfing gear guide. Include the sail — rinsing monofilm and batten pockets removes salt deposits that cause micro-abrasion over time.
Dry your wetsuit inside out in shade, not direct sunlight. UV exposure degrades neoprene cell structure and the glue in taped seams faster than repeated salt-water immersion. A wetsuit that’s been left to bake in summer sun will lose its thermal and stretch properties noticeably within a single season. Hang it by the waist, not the shoulders — hanging neoprene by the shoulder seams deforms the material at the stress point and shortens the garment’s functional life.
Sail Storage: Rolling vs. Folding and Why It Matters
Monofilm — the clear transparent material used in sail panels — is a biaxially oriented polyester film that creases permanently when folded under tension. A sail stored folded over multiple seasons develops crease lines that become stress points and eventually crack through the material. Roll sails from the foot upward around the mast, keeping the roll as large in diameter as practical, and store in a sail bag away from UV exposure and extreme heat. Battens should be removed or at minimum detensioned before long-term storage — leaving battens under full tension in a rolled or folded sail creates permanent batten pocket distortion.
Board Repair: What You Can Fix Yourself and What You Can’t
Minor cosmetic dings, pressure dents, and small rail chips are repairable by most riders with basic epoxy repair kits — the process is well-documented and not technically demanding. What matters is catching them early: a small ding left unrepaired allows water into the foam core, which expands and contracts with temperature changes and progressively enlarges the damage. Check your board’s entire surface after every rocky launch session. Structural damage — cracks through the deck, compromised fin boxes, delamination (the surface feels hollow or springy when pressed) — requires professional repair or, in severe cases, retirement of the board.
- Inspect fin boxes monthly: Wiggle each fin laterally after fitting — any movement beyond minimal flex indicates a loose box that needs professional attention before it fails under load.
- Re-wax non-EVA deck areas seasonally: Board wax on grip areas maintains traction and adds a thin waterproof layer over any micro-surface cracks.
- Store boards horizontally on padded racks: Storing vertically on the tail creates long-term stress at the tail block and fin box area — horizontal storage distributes weight evenly across the hull.
- Check mast base O-rings before each session: A cracked or missing O-ring allows water into the mast base fitting, which can cause the joint to seize or fail suddenly on the water.
- Replace downhaul and outhaul lines annually: Polyester rope degrades invisibly under UV and salt exposure — a line that looks serviceable can fail under load without warning.
Taking care of your windsurfing gear is not a chore to manage alongside the sport — it’s part of the craft of it. Riders who know their equipment intimately, who notice when a batten tension has shifted or a boom clamp has developed play, are better prepared on the water because that attentiveness transfers directly into how they read the rig’s behaviour during a session. A well-maintained kit and a well-calibrated rider develop together. For further reading on how equipment awareness connects to performance, explore the windsurfing mindset guide — it covers the mental dimension of gear decision-making in depth.
Windsurfing Gear Guide: Frequently Asked Questions
A complete beginner windsurfing kit — board, sail, mast, boom, mast base, harness, and basic safety gear — typically runs £700–£1,100 secondhand from a reputable seller, or £1,800–£2,500 new. The wide spread reflects condition, brand, and whether you source components as a matched kit or individually. The most common beginner mistake is over-investing in the sail and under-investing in the board, when a high-volume board is actually the component most responsible for early-stage progress. Budget the board as your primary spend and work outward from there. A useful cost guide is available through the RYA’s windsurfing training resources.
For most adult beginners, a board with volume at least twice your body weight in kilograms is the working guideline — at 80kg, that means 160 litres as a minimum, with 180–220 litres being more forgiving and productive for early learning. Width matters as much as volume: a board 85cm or wider provides significantly more lateral stability than a narrower board of the same volume, which directly reduces the fall rate during uphauling and basic steering drills. Don’t let anyone sell you a 130-litre intermediate board as a starter — the instability at that volume makes early-phase learning far more difficult than it needs to be.
For an average adult in typical learning conditions (8–16 knots of wind), a sail in the 5.0–5.5m² range is the most broadly useful starting point. This size is large enough to provide meaningful power in lighter learning conditions but manageable enough not to overpower a beginner in unexpected gusts. Heavier riders (90kg+) may benefit from a 6.0–6.5m² sail in the same wind conditions; lighter riders (under 65kg) can often manage 4.5–5.0m² comfortably. Always match sail size to actual wind at your spot on any given day — owning one sail means you will have sessions where you’re slightly over- or under-powered, which is a normal and acceptable trade-off at the beginner stage.
Most components are cross-compatible through industry-standard interfaces, but with important caveats. Mast bases use a universal joint standard that fits most boards’ mast tracks. Booms attach to masts via a standardised diameter range (RDM — Reduced Diameter Mast — and SDM — Standard Diameter Mast). The critical compatibility issue is mast-to-sail: each sail is designed for a specific mast IMCS rating (stiffness) and luff length, and pairing a sail with the wrong mast produces incorrect sail shape regardless of other tuning. Always check the sail manufacturer’s recommended mast specification before mixing brands, and prioritise IMCS match over brand loyalty when selecting replacement masts.
Most riders achieve independent sailing on a beginner board in light to moderate winds within 3–5 days of structured instruction — enough to uphaul reliably, steer on both tacks, and return to a designated point. Planing (getting the board up onto the water surface at speed) on a smaller intermediate board typically requires 15–30 additional sessions depending on wind conditions and instruction quality. Harness use, water-starting, and gybing are intermediate skills that develop over a first season of regular sailing. The progression curve is steeper with consistent, frequent sessions (two or three times per week) than with occasional weekend sailing — the sport rewards regularity more than duration in the early phase.
Yes — strongly. A two-day RYA beginner course or equivalent teaches you to sail on school equipment before you commit to purchasing a kit of your own. This is valuable for two reasons: first, it confirms the sport suits you before a significant financial outlay; second, the instructor can advise on appropriate gear for your weight, local conditions, and learning goals after watching you sail. Many beginners who skip instruction and buy gear immediately end up with equipment that doesn’t match their needs and can’t identify whether their struggles are skill-based or equipment-based. Lessons first is the recommendation of virtually every experienced windsurfer you will ever speak to, regardless of how much they love the sport and want you to get into it. For the mental preparation that complements the physical instruction, the windsurfing mindset guide is a useful companion resource.
